
Changing The Colors Of Clock Parts
The "Colors" Settings Panel controls colors for individual clock elements of the clock. These include the face elements and hand elements.
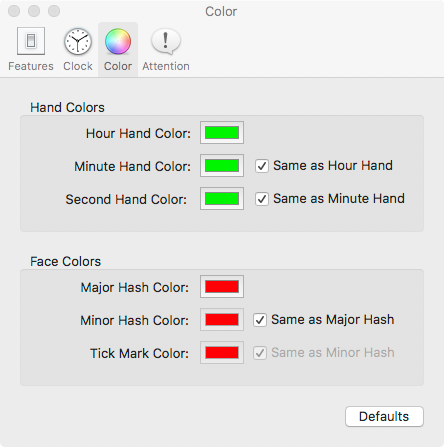
The "Colors" Settings Panel controls colors for individual clock elements of the clock. These include the face elements and hand elements.
Changing the Colors of Clock Parts
The clock's "Colors" panel will appear in the window. Change the settings in that panel as desired or click the "Defaults" button to return those settings to their default values.
Note that if a clock element is hidden, the color setting will be disabled. You must make that element visible in the "Clock" panel and then return to this panel to change its color.
Note that for each element, not only can you change its color but you can also change its transparency. The transparency setting for a clock element will only apply to that element; the total transparency for the element will be the sum of the overall clock transparency and the individual element transparency.
Close the Settings window when desired changes have been made. Or, another panel may be selected to change additional clock settings.
LucidTime Menus
About Clock Settings
Changing A Clock's Size & Overall Transparency
Changing A Clock's Appearance
Changing How Long A Clock "Comes To Fore"
Answers To Common Questions